
Side Dishes
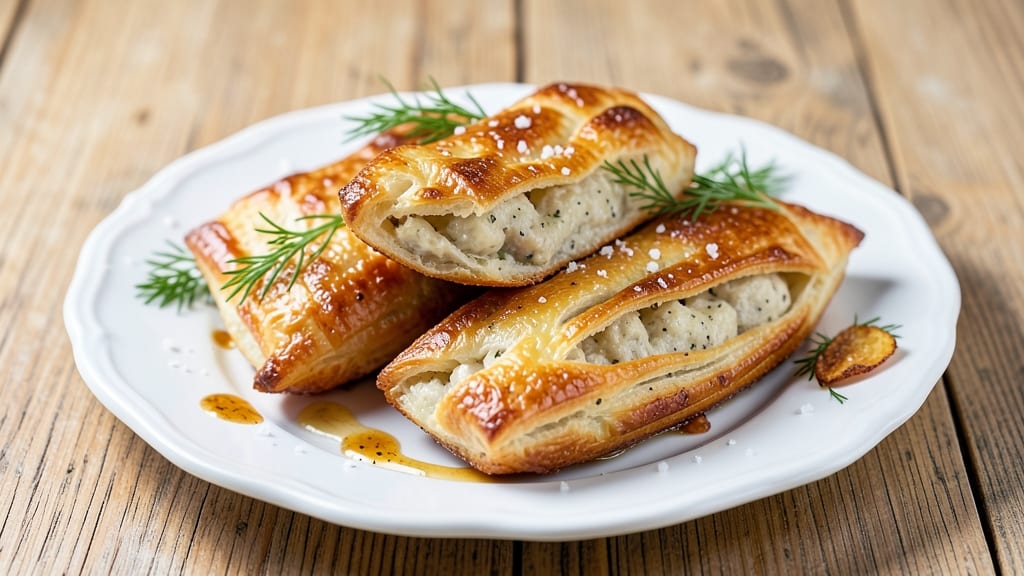
This authentic potato knish recipe brings the golden, lattice-topped magic of Eastern European Jewish tradition to your kitchen. 💛 The secret lies in a yeast-based dough that creates flaky, crispy layers over a rich, savory potato filling—each bite delivers the perfect balance of tender crust and hearty filling.
What sets this recipe apart is the traditional method: dough rolled thin for delicate layers, filling packed with mashed potatoes, onions, and just the right amount of fat for that signature melt-in-your-mouth texture. The lattice topping isn’t just decorative—it’s essential for that signature crispy finish that makes knishes irresistible.
By following this recipe, you’ll achieve restaurant-quality knishes with a crispy lattice crust that flakes perfectly and a filling so flavorful it disappears in seconds. The aroma alone will transport you to a bustling deli counter, where these knishes are a beloved staple.
Perfect for holiday gatherings, potlucks, or a comforting weeknight snack, this recipe delivers the warmth and tradition of a classic dish. Let’s get started on creating these golden, flaky masterpieces.
Ingredients for authentic potato knish
Sixteen ingredients transform into golden, lattice-topped knishes with restaurant-quality flaky crusts.
| Ingredient | Amount | Notes |
|---|---|---|
| All-Purpose Flour 🌾 | 4 cups | High-protein preferred for elasticity |
| Active Dry Yeast 🍞 | ¼ oz | Or 2.5 tsp, dissolved in warm water |
| Granulated Sugar 🍚 | 1 tbsp | For yeast activation |
| Salt 🧂 | 1 ½ tsp | Diamond Crystal preferred |
| Unsalted Butter 🧈 | ½ cup | Cold, cubed for dough |
| Russet Potatoes 🥔 | 3 lb | Starchy variety, peeled and boiled |
| Yellow Onions 🧅 | 1 ½ whole | Medium, finely diced |
| Unsalted Butter 🧈 | ¼ cup | Melted for filling richness |
| Heavy Cream 🥛 | ½ cup | Full-fat for optimal texture |
| Large Eggs 🥚 | 1 whole | Room temperature for binding |
| Whole Milk 🥛 | ¼ cup | For dough tenderness |
| Poppy Seeds 🌱 | 2 tsp | Optional traditional garnish |
| Coarse Salt 🧂 | 1 tbsp | For lattice topping |
The dough's success hinges on high-protein flour—King Arthur or Bread Flour from Whole Foods or King Arthur Flour's website are ideal. Fresh yeast is non-negotiable; check expiration dates as old yeast fails to activate. For the potatoes, Russets are essential—their starchy nature creates that signature melt-in-your-mouth texture. Sweet potatoes won't give the same result. The lattice topping requires patience: roll the dough paper-thin for those delicate layers that become crispy yet tender when baked. If your kitchen is warm, proof the dough in a lightly oiled bowl to prevent drying.
No high-protein flour? All-purpose plus 1 tbsp vital wheat gluten mimics the texture. For the filling, substitute Greek yogurt for heavy cream if needed (reduce by 2 tbsp). The onions can be red or white, but yellow adds subtle sweetness. Want extra richness? Add 1 tbsp sour cream to the filling. The poppy seeds are traditional but optional—sesame seeds work equally well. For a vegan version, replace butter with vegan butter** and use plant-based milk, though the texture will differ slightly. The key to perfect knishes is the butter-to-potato ratio—don't skimp on the fat for that signature melt.
Store unbaked dough wrapped in plastic for 2 days in the fridge or freeze for 3 months. The filling can be prepped ahead and refrigerated for 1 day. Baked knishes reheat beautifully—350°F for 10 minutes wrapped in foil restores their crispiness. For serving, keep them warm in a 200°F oven on a wire rack to maintain that golden crunch. These freeze exceptionally well: bake, cool completely, then freeze on a tray before transferring to bags. Reheat from frozen at 375°F for 15-20 minutes**. The aroma alone will transport you to a bustling deli counter.
Why You'll Love This Recipe
- No Yeast Struggles: I’ve made enough doughs that demand exact temperatures and proofing windows—this one’s different. The yeast here is forgiving: just warm water, a pinch of sugar, and 10 minutes while you chop potatoes. No waiting around, no second-guessing. Honestly, it’s the kind of recipe that lets you multitask without sacrificing that golden, pillowy crust.
- Butter-Loaded Payoff: That unsalted butter in the dough isn’t just for flavor—it’s for texture. The flaky layers melt into crispy edges while staying tender inside, and the salt in the filling (plus a pinch in the dough) balances everything perfectly. Between us, this is the kind of dish where you’ll lick the plate after everyone’s done eating.
- Freezer-Friendly Hero: Make a double batch and freeze the uncooked knishes between parchment paper. When you’re staring at a blank dinner board, pull them out, bake straight from frozen, and boom—homemade comfort food with zero effort. My college apartment survived on these; my in-laws still ask for seconds. (Yes, even on a Tuesday night.)
- Pantry Staple Magic: You’re already using ingredients you have: flour, yeast, butter. No specialty items, no obscure spices. The filling? Boiled potatoes, salt, pepper, maybe a splash of sour cream if you’re feeling fancy. It’s the kind of recipe that turns “what’s for dinner?” into “oh, we’re having knishes?” without breaking the bank—or your weekly grocery list.
Step-by-step instructions for authentic potato knish
Master the art of lattice crusts and savory fillings with this time-tested method.
👨🍳 Step 1: Prepare the Yeast Dough with Precision
In a stand mixer fitted with the dough hook, combine the 4 cups all-purpose flour, 1 tbsp granulated sugar, and 1.5 tsp salt. Mix on low speed until evenly distributed. In a separate bowl, dissolve the 0.25 oz active dry yeast in ¼ cup warm water (about 110°F—too hot and it dies, too cold and it won't activate).
Pour the yeast mixture into the flour blend and mix on low speed until combined. Add the 0.5 cup cold cubed unsalted butter and 0.25 cup whole milk, mixing until the dough begins to form. Increase speed to medium and knead for 5-7 minutes until smooth and elastic. The dough should pull away from the sides of the bowl and spring back when pressed.
Here's the thing—high-protein flour is key for that authentic chewy texture. If your dough feels too sticky, add 1-2 tablespoons more flour gradually. Shape into a ball, place in a lightly greased bowl, cover with a damp towel, and let rise in a warm place for 1-2 hours or until doubled in size. Patience here ensures that perfect lattice pattern later.
🍳 Step 2: Create the Savory Potato-Onion Filling
While the dough rises, peel and boil the 3 lb russet potatoes in salted water until fork-tender (15-20 minutes). Drain and mash them with the 0.25 cup melted unsalted butter, 0.5 cup heavy cream, and 1 whole large egg. Season generously with salt and pepper to taste—the filling should be rich but not overly wet.
In a separate pan, sauté the 1.5 whole yellow onions in 1 tbsp butter over medium heat for 8-10 minutes until caramelized and translucent. Fold these onions into the potato mixture for depth of flavor. The filling should be smooth but still hold its shape when packed into the knish. If it's too loose, add 1-2 tablespoons more flour to bind it.
Real talk: The secret to an authentic knish is in the caramelization of the onions. Don't rush this step—you want them to develop that sweet, golden hue before mixing with the potatoes. This is what makes the filling sing.
🥘 Step 3: Assemble and Shape the Knishes
Preheat your oven to 375°F. Roll out the risen dough on a floured surface to about ⅛-inch thickness. Cut into 6 equal rectangles (about 8x10 inches each) using a sharp knife or pizza cutter. Divide the filling evenly among the rectangles, spreading it in a thin layer, leaving a 1-inch border around the edges.
Fold each rectangle in half like a letter, then pinch the edges tightly to seal. Use a sharp knife to cut ½-inch slits along the folded edge, creating a classic lattice pattern. Brush the top with a beaten egg wash for a golden finish. Here's where it gets fun—sprinkle the 2 tsp poppy seeds and 1 tbsp coarse salt over the lattice before baking.
Don't skip the egg wash—this creates that signature crispy, golden crust. And the poppy seeds add that traditional Jewish bakery touch that makes these knishes truly authentic. Place the knishes on a parchment-lined baking sheet, leaving space between them for even browning.
🔥 Step 4: Bake to Crispy Perfection
Bake for 30-35 minutes until the lattice is deep golden brown and the filling is bubbling through the slits. The knishes should sound hollow when tapped on the bottom—this is your cue that they're fully cooked. Rotate the baking sheet halfway through for even browning.
If the tops aren't browning quickly enough, increase the oven temperature to 400°F for the last 5-10 minutes. The lattice should be crisp enough to hold its shape but still tender enough to bite through. Let them cool for 5 minutes before serving—this allows the filling to set slightly and makes slicing easier.
This is the moment that matters: The contrast between the crispy lattice and the creamy potato filling should be irresistible. Serve warm with a dollop of sour cream or a sprinkle of fresh dill if you're feeling fancy. These knishes are best enjoyed fresh from the oven when the crust is at its peak crispness.
Pro Tips For Making Authentic Potato Knish
- USE COLD BUTTER: I learned this the hard way—mixing softened butter into the dough makes it gummy and hard to handle. Take that butter straight from the fridge, cut it into small cubes, and work it into the flour last while shaping the knish. The cold fat creates flaky layers that actually crisp up when baked.
- LET THE DOUGH REST—REALLY: Skipping the 1-2 hour rise is tempting, but the dough needs time to relax or it’ll shrink like a sad soufflé. Cover it with a damp towel and leave it in a warm spot (like near the oven with the light on) until it puffs and springs back when poked. This makes rolling and folding way easier.
- DON’T OVERWORK THE DOUGH: I used to knead like I was punishing the flour, but that develops gluten and turns the knish into a chewy brick. Mix just until the dough comes together, then handle it minimally when shaping. The goal is tender, not tough—think delicate pastry, not bread.
- SEAR THE POTATO FILLING: Raw potato filling makes soggy knishes. After boiling and mashing, spread the potatoes in a thin layer on a baking sheet, drizzle with a little oil, and roast at 400°F for 10 minutes until golden. The extra crispiness carries through the dough and keeps the knish from turning into a sad, damp mess.
Troubleshooting this recipe
Dough Too Sticky?
If your dough feels too sticky during kneading, don't panic—this is common with high-moisture doughs. Gradually add 1-2 tablespoons of all-purpose flour while kneading until it pulls away cleanly from your fingers. Overworking the dough can make it tough, so knead just until smooth (5-7 minutes).
If the dough still sticks after adding flour, wet your hands slightly with water to prevent sticking while shaping. 💡
Filling Too Wet?
A loose filling will leak through the lattice during baking. If your potato mixture feels too wet, add 1-2 tablespoons of flour to bind it. For extra insurance, mix in 1 tablespoon of sour cream or Greek yogurt—this adds richness while helping the filling hold its shape.
The filling should be thick enough to stay contained when packed into the dough rectangles.
Lattice Collapsing?
If your lattice pattern collapses during baking, your dough may not have risen enough or been rolled too thin. Ensure your dough has doubled in size before rolling (1-2 hours proofing time).
Roll it to a consistent ⅛-inch thickness and cut the slits carefully—don't press too hard, or the dough will tear. Brush the lattice with egg wash immediately before baking to create a protective barrier that holds the shape.
Undercooked Centers?
Knishes with undercooked centers usually mean the oven temperature wasn't hot enough or they weren't baked long enough. Increase your oven temperature to 400°F for the last 5-10 minutes of baking to crisp the lattice.
Tap the bottom of the knish—it should sound hollow when fully cooked. For extra insurance, use an instant-read thermometer to check the filling reaches 165°F in the center.
Dry or Tough Crust?
A dry, tough crust often results from overworking the dough or using too much flour. Knead just until smooth (5-7 minutes) and avoid adding excessive flour. For extra tenderness, incorporate 0.25 cup whole milk into the dough as specified.
If the crust still feels dry after baking, brush the warm knishes with a little melted butter before serving to restore moisture.
Filling Not Flavorful?
If your filling lacks depth, focus on caramelizing the onions—this is where most of the flavor develops. Cook them slowly over medium heat for 8-10 minutes until golden and sweet. Don't skip the 1 tbsp butter in the filling either—this adds richness.
For extra umami, add ½ teaspoon onion powder or garlic powder to the filling mixture. Season generously with salt and pepper before baking.
Nutrition facts
Frequently asked questions about authentic potato knishes
What makes this knish recipe truly authentic?
This recipe stays true to Eastern European Jewish tradition with a yeast-based dough that creates flaky, crispy layers and a rich potato filling packed with caramelized onions. The lattice topping isn't just decorative—it's essential for that signature crunch. Using high-protein flour and proper proofing time ensures the dough develops the right chewiness, while the precise butter-to-potato ratio delivers that melt-in-your-mouth texture.
Can I make knishes without a stand mixer?
The dough can be mixed by hand on a floured surface using a wooden spoon or your hands. Knead for 8-10 minutes until smooth and elastic. For the filling, use a potato masher instead of a mixer—just be sure to press out all lumps for a silky texture. The key is patience: let the dough rise fully and roll it thin for that authentic lattice pattern.
How do I store leftover knishes?
Keep baked knishes fresh by storing them in an airtight container at room temperature for 2 days. For longer storage, freeze them after baking: cool completely, wrap individually in plastic wrap, then place in a freezer bag. Reheat from frozen at 375°F for 15-20 minutes until warmed through. The filling will be slightly firmer when reheated but still delicious.
What's the best way to reheat knishes?
For best results, reheat knishes in a 375°F oven for 10-12 minutes wrapped in aluminum foil to restore moisture. For extra crispiness, place them on a wire rack in the oven. Microwaving works in a pinch (30-45 seconds), but the crust won't be as crisp. The secret to perfect reheating is low heat—this prevents the filling from becoming gummy while keeping the lattice crisp.
Can I substitute sweet potatoes for russets?
While you can use sweet potatoes, they won't give the same authentic texture. Sweet potatoes are denser and less starchy, which affects both the filling's creaminess and the knish's overall structure. If you must substitute, mix half sweet potatoes with half russets and add 1 extra tablespoon of butter to compensate for the lower fat content in sweet potatoes. The flavor will differ significantly from traditional knishes.