
Side Dishes
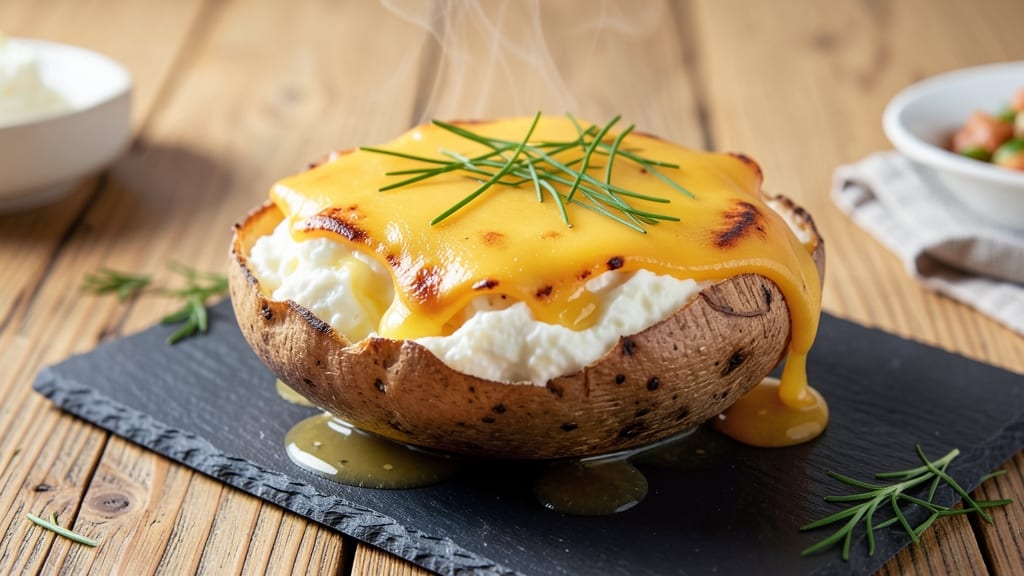
This twice cooked baked potato recipe delivers the perfect balance of crispy golden crust and ultra-creamy centers—every time. The secret lies in baking the potatoes thoroughly, cooling them completely, then reheating with butter and cream to create that signature tender interior and crispy exterior.
This classic technique transforms a simple potato into a restaurant-worthy side dish that's impossible to resist.
The process starts with baking russet potatoes until fork-tender, then cooling them before scooping out the insides. What makes this recipe special is the second bake—where the potato flesh becomes velvety smooth while the crust develops that irresistible crispiness.
It's a foolproof method that works equally well in a conventional oven or air fryer, making it versatile for any kitchen.
What you'll end up with is a potato that's creamy on the inside and crispy on the outside, ready to be loaded with your favorite toppings. The texture contrast is what makes this dish so satisfying—each bite delivers that perfect combination of tender and crispy.
This is the kind of potato that turns a simple meal into something truly special.
Whether you're serving these as a side for a holiday dinner or as a comforting weeknight meal, this recipe delivers professional-quality results with minimal effort. The best part? You can customize the toppings to suit your taste—cheese, bacon, chives, or sour cream all pair beautifully. Let's get started!
Ingredients for twice cooked baked potato
Four russets and a handful of pantry staples transform into restaurant-worthy potatoes.
| Ingredient | Amount | Notes |
|---|---|---|
| Russet Potatoes 🥔 | 4 whole | Large russets, 12-15 oz each |
| Unsalted Butter 🧈 | ½ cup | Cold, cubed for topping |
| Heavy Cream 🥛 | ½ cup | Full-fat for creaminess |
| Sour Cream 🧀 | ¼ cup | Room temperature preferred |
| Shredded Cheddar Cheese 🧀 | 1 cup | Sharp cheddar recommended |
| Chives 🌿 | ⅛ cup | Fresh, finely chopped |
| Garlic Cloves 🧄 | 2 cloves | Minced for flavor base |
| Salt 🧂 | 1 ½ tsp | Diamond Crystal preferred |
| Black Pepper 🌶️ | ½ tsp | Freshly ground for heat |
| Olive Oil 🫒 | 1 tbsp | For brushing potato skins |
| Bacon 🥓 | 4 oz | Cooked, crumbled for topping |
Russet potatoes are the star here—Idaho-grown russets have that perfect mealy interior, but any russet works. Costco or Trader Joe's usually have them pre-washed and ready to go. Look for potatoes that feel heavy for their size (that means they're packed with starch). The larger the potato, the more dramatic that crispy crust will be. If you're short on time, pre-cut russets from the grocery store's prepped veggie section work too, but they're pricier. Pro tip: pat them dry before baking—they'll crisp up faster.
No heavy cream? Half-and-half or whole milk with 1 tbsp melted butter works in a pinch, though the texture won't be quite as velvety. Swapping cheddar for Gruyère or smoked Gouda adds depth, while blue cheese crumbles bring a tangy kick. Chives wilting? Dried chives at half the amount save the day. The bacon can be any kind—thick-cut, regular, or even turkey bacon for a lighter option. For extra crispiness, brush those skins with a little mayo mixed with paprika before the second bake. Trust me, it's worth it.
Baked potatoes keep 3 days in the fridge wrapped tightly in foil—reheat in the oven at 375°F for 15 minutes. The filling? Make it ahead and store it separately in an airtight container for up to 2 days. Freeze the filling for 3 months by portioning it into silicone molds. For the ultimate shortcut, bake a batch of these on Sunday and reheat portions throughout the week. They're even better the second time around—like a cozy hug in potato form.
Why You'll Love This Recipe
- Here’s what sold me: the first bake gets them fluffy inside, then the second hit—just a quick broil with butter and cheese—gives that golden, crispy edge. That contrast? Ridiculously good. The sour cream ties it all together like a hug.
- No-Peel, No-Stress Prep: The only "work" is poking holes in those Russets—no peeling, no scrubbing, no fuss. I just toss them in the oven, then slice open the warm skins later and let everyone load up their own bowls. That’s my kind of dinner.
- Creamy Crispy Magic: Here’s what sold me: the first bake gets them fluffy inside, then the second hit—just a quick broil with butter and cheese—gives that golden, crispy edge. That contrast? Ridiculously good. The sour cream ties it all together like a hug.
- Lunchbox Hero: Between us, this is my go-to for meal prep. I bake a big batch on Sunday, slice them up, and pack them cold for work lunches. The cheddar stays melted, the cream keeps it rich, and honestly? No one skips their potato.
Step-by-step instructions for twice cooked baked potato recipe
Here's how to achieve that perfect balance of crispy golden crust and velvety creamy centers every time.
Bake the Potatoes to Perfect Doneness
Preheat your oven to 425°F and prick each of the 4 whole Russet Potatoes with a fork about 8 times per potato to allow steam to escape. This prevents bursting and ensures even cooking. Brush the skins generously with 1 tablespoon Olive Oil and sprinkle evenly with 1 teaspoon Salt—this creates the foundation for that crispy crust we're after.
Place the potatoes directly on the oven rack (not in a pan) for even heat circulation. Bake for 45-50 minutes, rotating halfway through, until they feel light when shaken and a fork slides in easily with no resistance. The key is patience here—they should be fully cooked through but not dried out. If you poke them too early and they're still firm, return them to the oven for another 10-15 minutes.
Slice Open and Fluff the Interiors
Carefully slice each potato in half lengthwise using a sharp chef's knife. You want clean cuts that don't tear the flesh. Transfer the halves to a baking sheet and let them cool slightly for 5 minutes—this makes them easier to handle without falling apart. Use a spoon to gently scoop out the insides, leaving about ¼-inch thick walls to support the crust.
Here's the secret to ultra-creamy centers: use two forks to mash the potato flesh until it's completely broken down with no lumps. This step ensures your filling will be silky smooth rather than chunky. Transfer the mashed potatoes to a mixing bowl and set aside—we'll be adding our rich toppings next.
Cook the Bacon and Prepare the Filling
While the potatoes cool, cook the 4 oz Bacon in a skillet over medium heat until crispy. Drain on paper towels and crumble into small pieces—you want bite-sized bacon throughout your potatoes. In the same skillet, add 2 cloves Garlic Cloves (minced) and cook for 30 seconds until fragrant, being careful not to burn them.
To the mashed potatoes, add the 0.5 cup Heavy Cream, 0.25 cup Sour Cream, 1 cup Shredded Cheddar Cheese, 0.5 teaspoon Black Pepper, and the remaining 0.5 teaspoon Salt. Mix until completely smooth, then fold in the cooked bacon and garlic. The filling should be thick but still spreadable—if it's too thick, add 1 tablespoon of the potato water you reserved.
Assemble and Bake the Twice-Cooked Potatoes
Preheat your oven to 375°F for the second baking. Spoon the filling back into the potato skins, mounding it slightly above the edges. Press down gently to create a smooth surface—this helps the crust form evenly. Dot the tops with 0.5 cup Unsalted Butter (cold, cubed) and sprinkle with the 0.125 cup Chives.
Bake for 20-25 minutes until the edges are golden brown and the filling is bubbling at the edges. The butter will melt and create that irresistible crispy crust while keeping the centers warm and creamy. Watch closely in the last 5 minutes—if the tops are browning too quickly, tent loosely with foil to prevent over-browning.
Rest and Serve for Maximum Creaminess
Let the twice-baked potatoes rest for 5 minutes after baking—this crucial step allows the filling to set slightly and prevents a runny mess when you cut into them. Serve immediately with extra crumbled bacon on top and additional Shredded Cheddar Cheese if desired. The contrast of crispy edges and creamy centers should make each bite unforgettable.
For the best results, serve while still warm. The texture contrast between the crispy crust and velvety filling is what makes this dish truly special. If you're making these ahead, assemble them but don't bake until ready to serve—this keeps the potatoes from getting soggy.
Pro Tips For Making Twice Cooked Baked Potato
- USE A POTATO PEELER: Russets are thick-skinned, and scraping the outer layer with a peeler (about 1/8-inch deep) cuts down on gritty texture when you mash them the second time. I used to skip this and wondered why my loaded potatoes always tasted like dirt.
- SALT THE POTATOES BEFORE BAKING: Toss the halved Russets with a teaspoon of salt before the first bake—it seasons the flesh and keeps the flavor balanced when you mix in the butter and cream later. I learned this the hard way after making a batch that tasted bland until I added extra salt at the end.
- DON’T OVERMIX THE CREAM: When combining heavy cream, sour cream, and butter, stir just until melted and smooth—overworking it turns the topping into a gluey mess. A fork or rubber spatula, a few gentle folds, and you’re done. I’ve ruined more loaded potatoes trying to "fix" a lumpy topping than I’d like to admit.
- BAKE THEM COLD, NOT HOT: Let the twice-cooked potatoes sit at room temp for 10–15 minutes before serving—they’ll hold their shape better and the cheese won’t slide off. I used to serve them straight out of the oven, and half the filling would end up on the plate.
Common mistakes when making this recipe
Overcooking First Bake
I've seen so many people rush the first bake and end up with dry, crumbly potatoes. The key is patience—your russets should be fully cooked through but still hold their shape when pierced with a fork.
If you bake them until they're falling apart, they'll turn to mush when you mash them for the second round. Aim for 45-50 minutes at 425°F—shake them gently to check for doneness. If they feel too light (meaning undercooked), return them for another 10 minutes. 🌡️
Skipping the Cooling Step
This is a big one! Many home cooks skip letting the potatoes cool completely after the first bake, and that's a recipe for disaster. Warm potatoes will steam when you scoop them, making the filling watery and the crust soggy.
Give them at least 15-20 minutes to cool before handling. I like to transfer them to a wire rack to speed up the process—this prevents condensation from building up underneath.
Underfilling the Potatoes
Some recipes call for a minimal filling, but that's where the magic happens! The filling should mound slightly above the edges of the potato skin—this creates that beautiful crispy crust when it bakes. If you're shy with the filling, the edges won't get that golden, buttery crisp we're after.
Don't be afraid to pack it in there! Just press down gently so it's even and smooth before the second bake.
Using Wrong Potato Type
Not all potatoes are created equal! Russets are the gold standard for twice-baked potatoes because of their high starch content and mealy interior. If you try this with Yukon Golds or red potatoes, you'll end up with a gluey mess.
Stick to russets—Idaho-grown ones are my absolute favorite. They hold their shape during the first bake and create that perfect creamy texture when mashed. 🥔
Overmixing the Filling
When you're mixing the filling, it's easy to overdo it and create a gummy texture. Once you've combined all the ingredients, give it just one or two gentle stirs to incorporate everything.
Overmixing develops gluten in the potatoes, making the filling tough rather than silky. I like to use two forks to gently fold everything together—this keeps the texture light and airy.
Not Resting After Second Bake
This final resting period is crucial for getting that perfect texture. If you cut into the potatoes immediately after baking, the filling will run out all over your plate. Let them rest for 5 minutes so the filling can set slightly.
This gives you that clean slice with minimal mess. Pro tip: If you're serving a crowd, assemble them on a baking sheet and let them rest there—it makes plating so much easier! 💡
Nutrition facts
Frequently asked questions
Why do twice-baked potatoes need two baking sessions?
The first bake cooks the potatoes through while keeping the skins intact. Cooling them completely prevents steaming when you add the filling. The second bake creates that signature crispy crust from the butter while keeping the centers ultra-creamy—you can't get that same texture with just one baking!
Can I make these in an air fryer instead of an oven?
For the first bake, place whole potatoes in the air fryer at 400°F for 30-35 minutes, shaking halfway. After scooping and filling, air fry at 375°F for 10-12 minutes until golden. The air fryer gives you extra crispiness with less fat—just watch closely to avoid burning!
What's the best way to store leftover twice-baked potatoes?
Store them in an airtight container in the fridge for 3 days. To reheat, cover with foil and bake at 350°F for 15 minutes. For longer storage, freeze the filling separately (up to 3 months) and reheat the skins separately before adding the filling back. Never freeze the assembled potatoes—they'll get soggy!
Can I use sweet potatoes instead of russets?
Technically yes, but they won't have the same texture. Sweet potatoes are lower in starch and higher in moisture, which makes them gluey when mashed. If you must use them, roast them first at 400°F for 45 minutes to drive out excess moisture, then proceed with the recipe—but expect a denser, less creamy result.
How do I fix potatoes that are dry after the first bake?
If your potatoes are dry, don't despair! Add 1-2 tablespoons of milk or cream to your filling to restore moisture. For extra insurance, brush the skins with a little olive oil before the second bake. The secret is in the first bake—always test doneness by gently shaking the potato (it should feel light but not mushy).